Tools You Will Need


We talk alot about the fact that the Window Bonnets cornice is No Sew. In other words, it does not require a sewing machine for you to prepare the fabric for application to the cornice board. However, you might be asking "What tools does it take? It must take some tools."

You are right, there are a couple of tools that are needed, but primarily for the hanging of the cornice. Let's take them in order.

1. A full-size LOW temperature glue gun. A full-size one is needed to be able to put enough glue along the edge and center before it begins to seriously set. The 9" high cornice can be made using the smaller craft size guns. But always use a LOW temperature gun or the glue will quickly melt the styrofoam material. I do sell these on my site as a convenience. I generally also include 3-5 10" sticks depending on how many cornices are purchased.

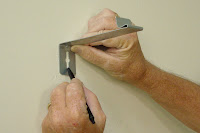
2. A hand drill, battery operated, or plug-in with a 1/8" drill bit. Very important, you do not have to find the stud in the wall. If the drill bit hits only drywall, no problem, just use the screw sleeve that is provided with the kit to tightly secure the screw in the wall. If you hit the metal rim around the window you will not need to use the screw sleeve.

3. Standard phillips-head screw driver. Now this one might not be needed if your drill is strong enough to turn the screw tightly. If not, you may need to use a bit of "hand" power to do the finally tightening.

4. Hammer, generally used to get the screw sleeve installed, but you might also want to use it with a punch/scribe to make a small indent in the wall marking the position for the drill.

5. A couple of items not pictured which are pretty common sense; a tape measure and a level. The tape measure to mark the position on the wall for each bracket and the level to well, check the level. Having said that, I have on more than one occasion had the brackets perfectly level across the window, put the cornice up and immediately saw that it was slanted. This is generally an optical illusion because of the mark of the ceiling line above, or items near the top of the window. Don't worry, for most instances, you can just bend the bracket up or down a bit and fix the look. Only once at a customer's home did we have to actually move the bracket. Just do it, the slant will drive you crazy!

6. Oops, I most forgot the scissors you will need to cut your fabric.

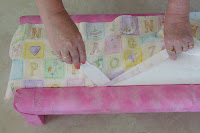
The Window Bonnets cornice kit includes the "magic" tuck tool. And indeed it is magic. When you see your finished cornice, no one will ever believe you just "tucked" the material into the grooves.

Several of my customers, even on their first cornice, have made a 9' cornice start to finish and hung in about 4 hours! You could never accomplish this with a wood cornice. Take a look at our complete how to section for more details. If you are a visual person, like me, I also include a complete video (DVD format) training guide with each purchase. You can stop the action as needed and really get it right.

http://www.windowbonnets.com/html/making_your_valance.html.

What is a Window Bonnets Cornice Kit?

In order to make a cornice, you have to start with EITHER a bunch of wood, wood working tools, soft foam, staple gun, scissors, stud-finder (you know the ones hidden in your walls!), and fabric. --OR-- a Window Bonnets cornice kit, scissors, low temperature glue gun, small drill (for that 1 screw per bracket) and, of course, the fabric.

Our kits make a full return cornice box over your window opening. Three simple steps and you are done. 1. Assemble, 2. Decorate, 3. Hang. Let me elaborate.

1. Assemble--take the low temperature, full-size glue gun, squirt glue on the flat edge of one straight piece, go all around the edge and swizzle a bit in the fat center part, then rub the two pieces together and hold so the front side of the two pieces you are joining are even across the front. Continue to do this until the full straight of the cornice is built. If you need to cut the final piece, take serated knife, electric knife or small hacksaw. To seal the cut (so the popies do not get all over the house) place a piece of aluminum foil over the edge and iron it with a moderate heat iron. When you pull the foil off it is completely sealed like new. If your cut is not straight use this trick to "straighten" the edge! Lastly glue the end caps on straight and you are done with step 1.

2. Decorate-- Now you are going to cut three strips from the fabric you have selected for the top, middle and bottom contours of the cornice. They can be all the same material, see some samples at http://www.windowbonnets.com/html/living_rooms.html, or use different fabric for the top/bottom and middle contours. This is your creative choice. Hint--the inexpensive material looks just at good as the expensive stuff! The instructions in the kit 9", 12" or 15" kit tells you how wide to cut the strips for each contour and as to the length, add 25" to the straight measurement so you have enough to go over and around the endcaps. Now the really simple part.... just tuck the fabric strip into the grooves cut in the cornice form! It is very easy and fun. If your cornice will be seen from the back, feel free to cover the back using the grooves at the top and bottom contours. Once done you are ready to hang.

3. Hang-- The brackets are all included in the kit with screws and screw sleeves. Two brackets come with each 48" kit and each extension of 32" includes another bracket. You only need to mount a bracket every 3'-4'. You do not need to find the stud in the wall. Using a small 1/8" drill bit, put a hole in the wall at the appropriate height. If you only hit drywall hammer in the screw sleeve and screw in the bracket. Although our video shows using two screws per bracket, it is really only necessary to use one. Once the brackets are up and level, hold the cornice up and position the bracket at the top tuck groove and push it onto the bracket.

You are done! Step back and I guarantee, a "WOW" will be next. I have made many of these cornices for people but I have talked with many of my first time "cornice makers" and they report that it takes approximately 4 hours to complete a 9 foot cornice! That's not much time compared to making a wood cornice. For more pictorial instruction, see this page on our site: http://www.windowbonnets.com/html/window_treatments_instruction.html.

No excuses now, measure those windows and get a kit. Try it, you will want to do more! Happy creating!!

What to Expect

Just thought I would let you know what to expect in the coming weeks.

When thinking about window treatments and cornices in particular, my experience is you want two things:

1. Ideas, see what others have done with their windows.
2. Beyond the how to and into the tips and tricks.


That is what you are going to get. We have a host of homes for you to few and I will give you the details about their fabric, construction and other important background information.

Then we will alternate this with tips and those "extra" pieces of information that can make the difference between ordinary and extraordinary and, yes, success and not so successful. Having said that, we have not had a customer yet, purchase our cornice product and not be able to make a beautiful cornice. It may have had it moments...

Check out the successes: http://www.windowbonnets.com/gallery_of_homes.html --Jan
We welcome your questions anytime.

Window Bonnets Start

It all started, January 1, 2006, I needed something to go on my windows. I needed to decorate and make this place a home with life and character and atmosphere. Technically, I do not have any real interior decorating education. I do work in the printing industry and know good printing and design. Perhaps that is of help, but I believe, for me, this is just something I feel. It feels good or it doesn't. When I came across this window decor for my own home, I liked it so much and so did my neighbors and friends, that I was encouraged to open a business. Thus was born Window Bonnets.

Since then I have been helping people create their own Window Bonnets. So what is it? A cornice kit that you can make yourself, that requires NO WOOD and NO SEWING. In fact , it is made of a product that is the opposite of wood, a dense formulated styrofoam! It requires no sewing to decorate, no special skills to assemble and no stud-finder tools to hang.

You cut three separate fabric strips to cover the top, middle and bottom of the cornice form. The easy part... you just tuck the fabric into the precut grooves in the cornice form. Then with 1 screw into the bracket into the wall, then the other end fits into the back tuck groove in your cornice and poof.... You have a beautiful, professional looking cornice that perfectly matches your room!
Wow, it does not get better than this.... check out my transformation picture above.

For more details, see my website:
http://www.windowbonnets.com/.

    Cornice Kits

    ••• No Wood, No Sew!!
    ••• Do-It-Yourself
    ••• Ultra-Lightweight
    ••• Easy To Hang
    ••• Investment Never Lost
    ••• Effortless Bay Window
    ••••••••• Treatments
    ••• Custom Window
    ••••••••• Treatments
    www.windowbonnets.com

    Followers